To invoice with Google Calendar you have four steps:
Calculate your work hours and add a $/hour.
Export this to Google Sheet.
Create Google Sheets invoice from templates.
Send it and watch the money roll in! 🤑
If you've ever found yourself scrambling to calculate how many hours you've worked on a project or trying to remember what you did last Tuesday, then this post is for you. I'm going to show you how to use Google Calendar and TimeNavi to streamline your invoicing process so that you can get paid faster - and make more money.
Google Calendar is great for keeping track of your schedule, but did you know that it can also be used to track your billable hours? That's right - by using TimeNavi, an app that integrates with Google Calendar, you can easily see how much time you've spent on a project and assign a cost to those hours. Then, when it comes time to invoice your client, all you have to do is export your hours from TimeNavi and include a link to the Google Sheet in your invoice. It's quick, easy, and best of all - it'll help you get paid faster. So let's get started!
1) Calculate your work hours
The first step is to calculate your work hours. This seems like a no-brainer, but it's actually crucial to ensuring that you're getting paid for all the hours you've worked. TimeNavi makes it easy by giving you the ability to see how many hours you've logged in each day, week, or month. Simply open the app and select the timeframe that you want to view. Then, take a look at your calendar and add up the total number of hours that you've worked.
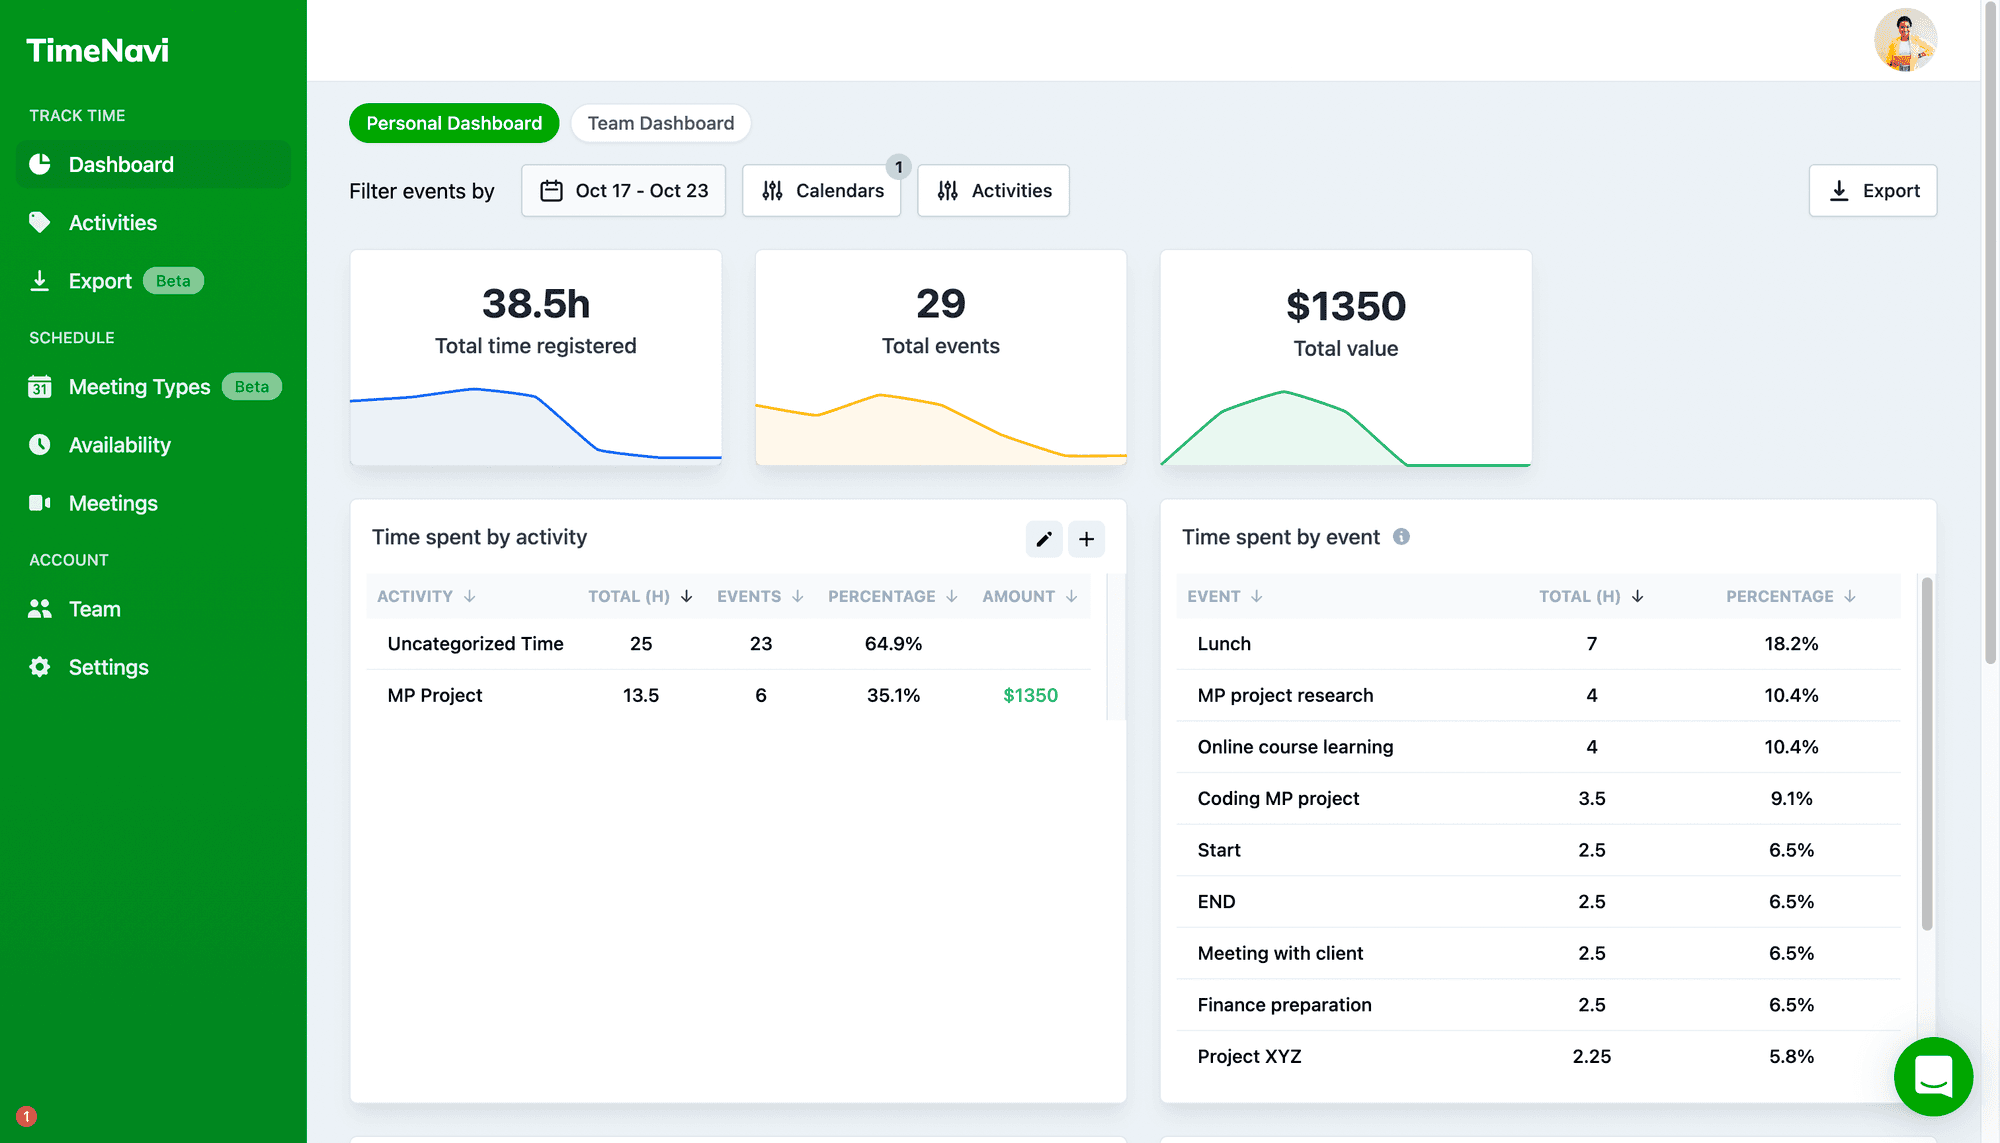
2) Add a $/hour
Now that you know how many hours you've worked, it's time to assign a cost to those hours. This is where things can get a bit tricky, as there are numerous factors that can affect your hourly rate. But don't worry - we're here to help! First, consider the type of work that you're doing. If it's highly specialized or requires a lot of experience, then you should charge more per hour than if it's something more entry-level. Second, think about how long it will take you to complete the project. If it's a small project that can be completed quickly, then your hourly rate can be lower than if it's a larger project that will take weeks or even months to finish. Finally, consider your own experience and expertise. Are you just starting out in your field or have been working in it for years? The more experience and expertise you have, the higher your hourly rate should be.
3) Export Google Calendar to Google Sheets
Once you've determined your hourly rate, it's time to export your hours from TimeNavi so that you can include them in your invoice. To do this, simply click on the "Export" button at the top of the screen and select "Google Sheets." This will generate a link to a Google Sheet containing all of the hours logged in TimeNavi within the specified timeframe.
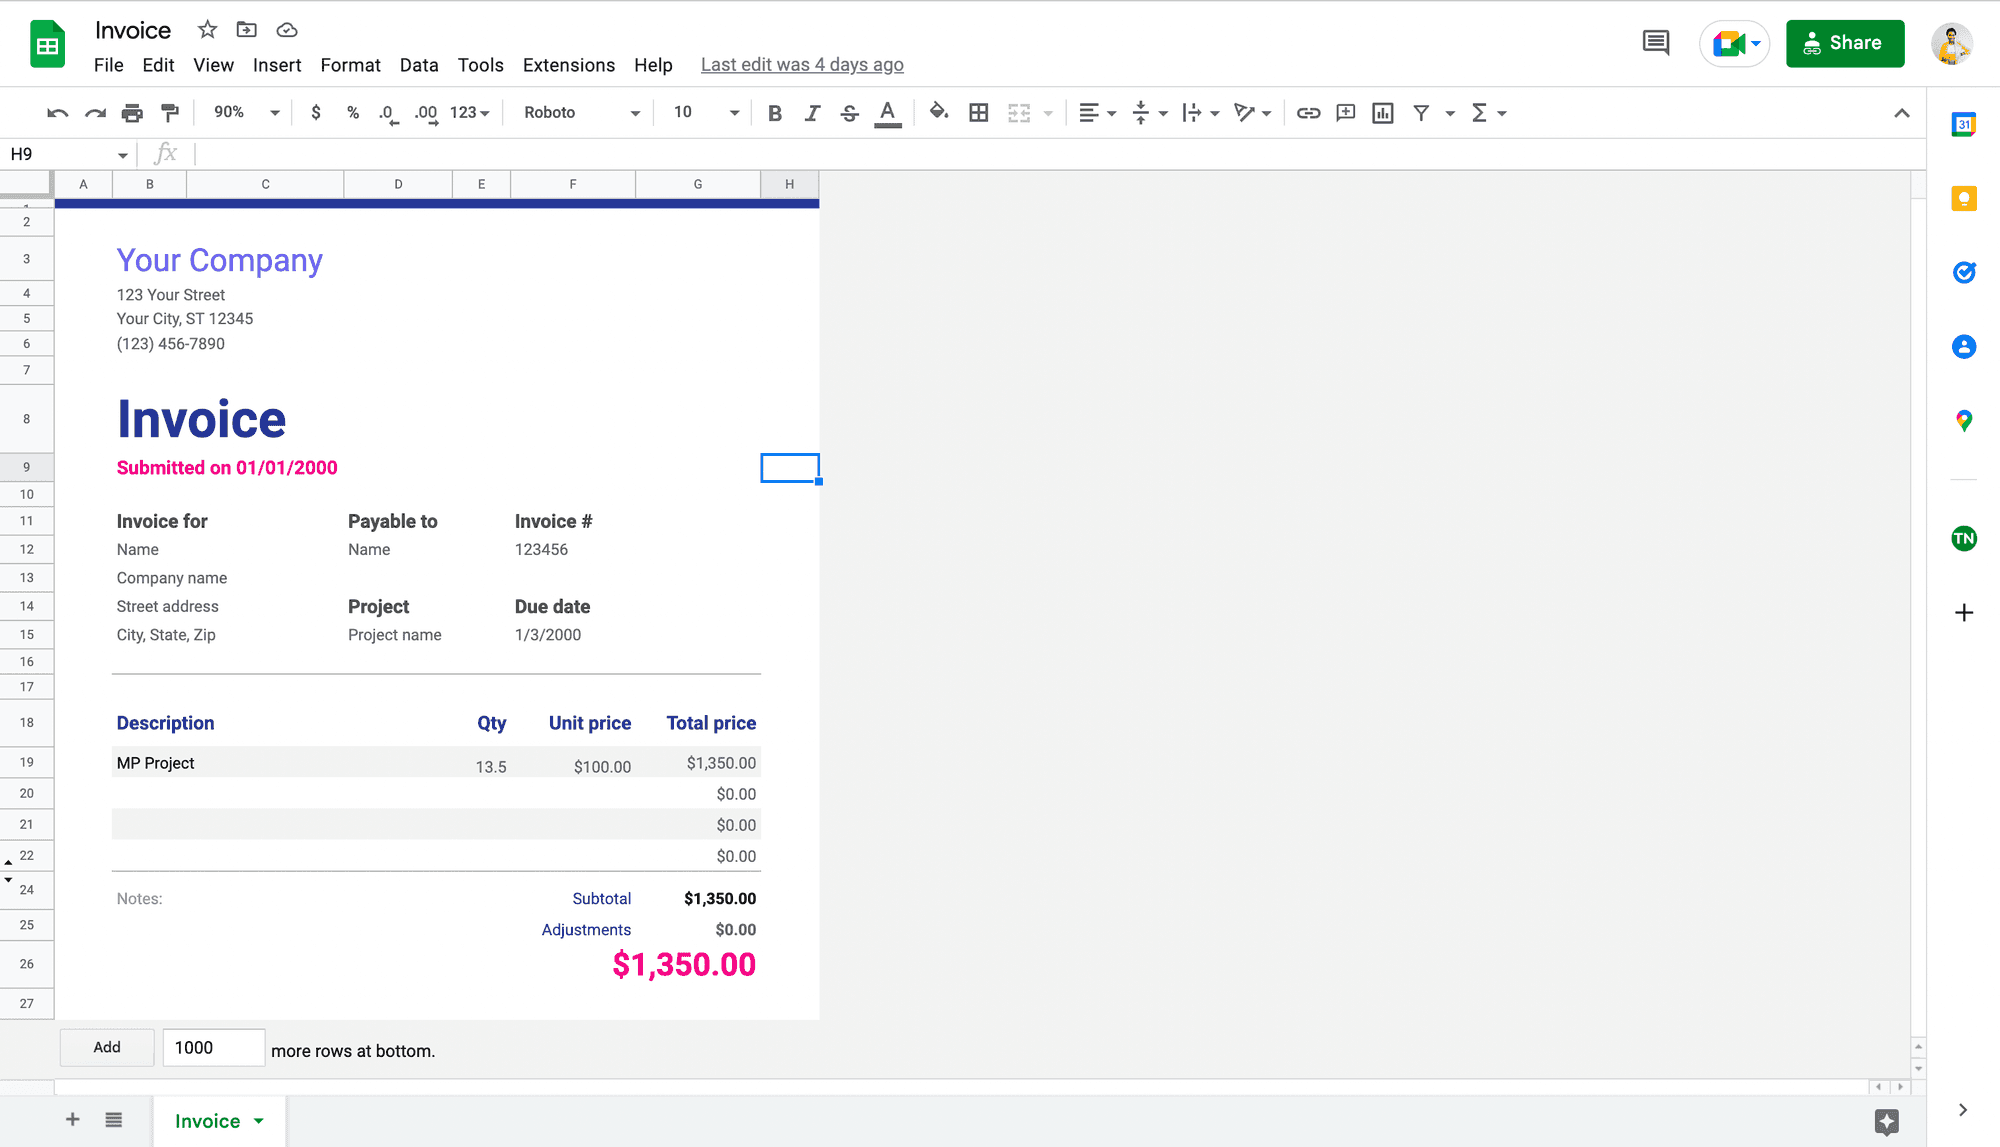
4) Add to Google Sheets template invoice
Next, add this to your invoice. If you don’t use accounting software to create your invoices for you, you can use Google Sheets. Google sheets have this handy template for an invoice. It means you can simply add your business details, time spent and hourly rate and you’ll have an invoice ready to go! If your client asks you can also include a link to the Google Sheet of your exported hours. To find it, simply go to Google Sheets and in the top right is a "Templates" button. Scroll down and bobs your uncle, there is your invoice template.
And that's all there is to it - using TimeNavi and Google Calendar you’ll find invoicing quick and easy so that you can get paid faster - and make more money.
By following the steps above you can use Google Calendar and TimeNavi together to streamline your invoicing process and get paid faster! In summary: first, calculate your work hours using TimeNavi; second, assign a cost per hour; third export your hours into a Google Sheet; fourth include the link in your invoice and fifth sit back and relax while the money rolls in! Give it a try today and tell us how it went!